
Our Process
How the Texas-RRR Roofing Process Works in San Antonio and Austin
Eight steps, first inspection to final walkthrough. If there's an insurance claim, we run it alongside the build.
Most homeowners replace a roof once, maybe twice, in a lifetime. You shouldn't have to guess what comes next. Below is our roofing process from inspection to insurance claim, in the order it actually happens on a San Antonio or Austin job. Who shows up. What you sign. When the materials land in your driveway, and what the crew does between tear-off and the last magnet sweep. A single repair follows it just like a full replacement does. And if a storm started all of this, the insurance track runs alongside the build, worked with you by our in-house staff, which includes former insurance adjusters.
The Eight Steps of a Texas-RRR Roofing Job
Step 1: Free Roof Inspection and Evaluation
It starts with a free roof evaluation, and yes, a Texas-RRR inspector actually gets up on the roof instead of eyeballing it from the yard. He photographs each slope, valley, penetration and flashing line. After hail or high wind we also look for bruised shingles, lifted tabs and dented soft metals on vents and gutters, because an adjuster will look for the same things later. Where we can reach the attic, we check that side too: daylight through the deck, water stains and sagging sheathing show up inside long before they show on the shingles. You get the photos either way. And if the roof still has life in it, we'll tell you so and leave you alone.
Read what we check on the roof inspection page.
Step 2: Written Estimate
Within a day or two you get a written estimate that spells out the scope line by line: tear-off, decking, underlayment, flashing, ventilation and the shingle or metal system we recommend. We write it that way on purpose. Hold it up against another bid or an insurance scope and you’ll see exactly where they differ. The estimate names the brand and product line, the underlayment type, the layer count coming off and whether we expect decking repairs, so nothing stays vague enough to argue about later. Charlie or your estimator walks you through it by phone or at the kitchen table. No pressure here. It’s your roof and your call.
Step 3: Material Selection
Once the scope feels right, we choose materials together. Texas-RRR installs Owens Corning and GAF shingle systems, both American brands, and we bring sample boards so you can hold colors against your brick or siding in daylight instead of guessing from a screen. Weighing standing seam metal instead? We’ll talk through hail performance, heat and upfront cost honestly. Color matters more than people expect in Texas heat, and a lighter architectural shingle runs a cooler attic than a dark one. Pick the system that fits the roof and the budget. The prettiest brochure shouldn’t get a vote.
Compare asphalt shingle roofing with metal roofing before you decide.
Step 4: Scheduling and Material Delivery
Your coordinator locks in an install date and orders the materials. Bundles, underlayment and accessories arrive a day ahead so the crew never waits on a truck. Eight full crew teams give us room to schedule around your calendar instead of ours, and we watch the Central Texas forecast closely; when weather moves a date, you hear from us first. We also handle the permit paperwork where your city requires one for a full re-roof. Before delivery, clear the driveway and pull patio furniture, grills and potted plants away from the eaves. Falling debris on tear-off day doesn’t care what it lands on.
Step 5: Tear-Off and Decking Inspection
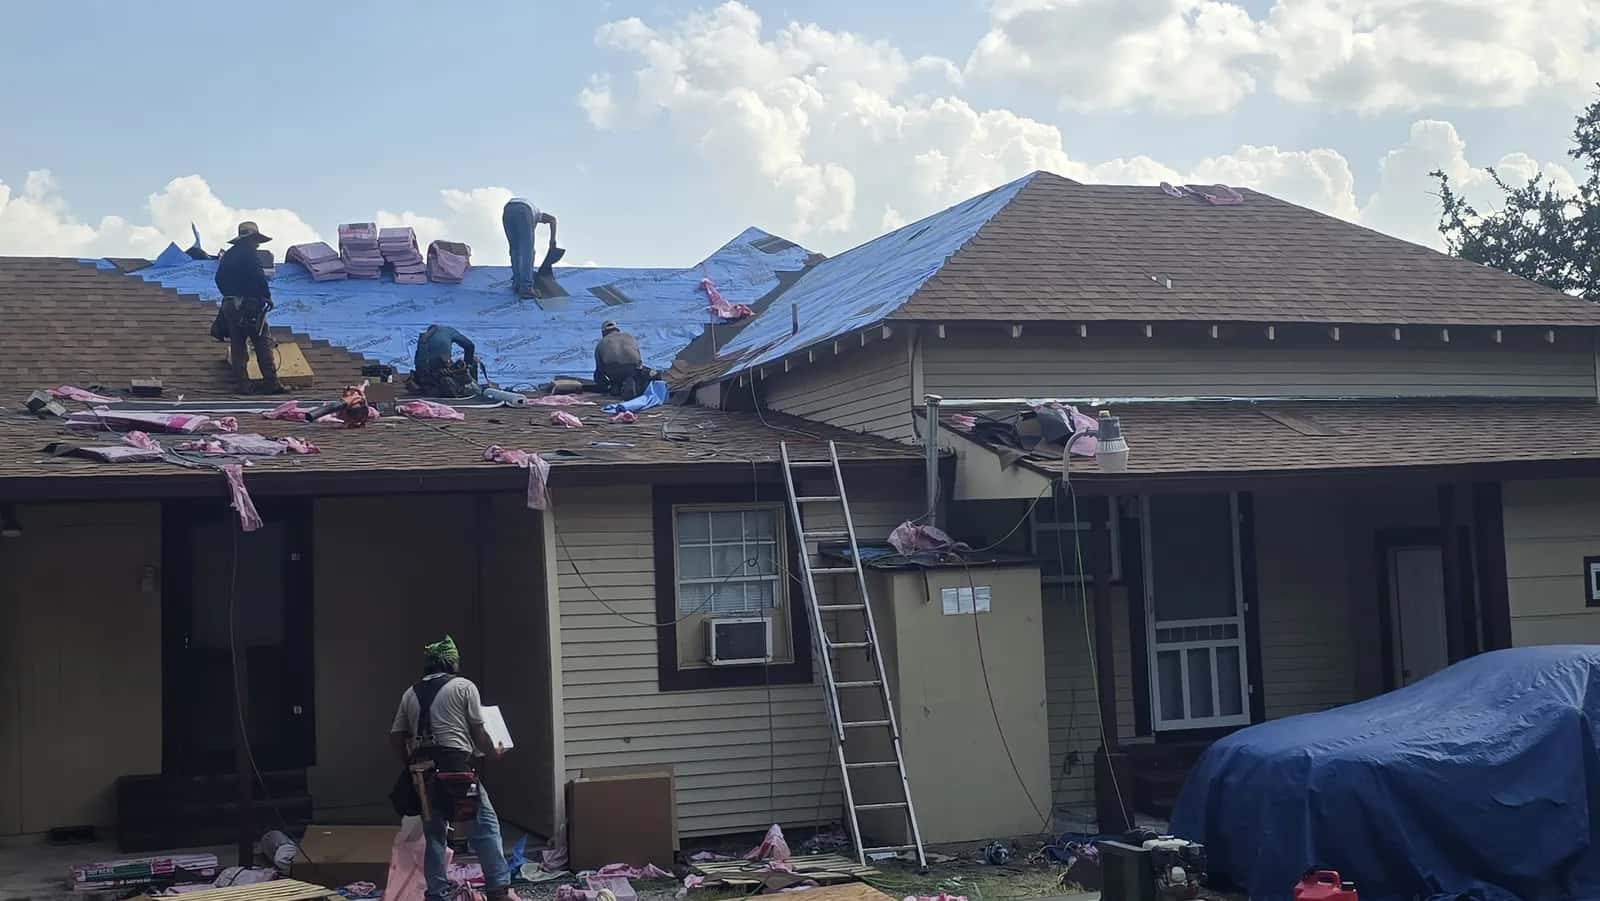
Install day starts early. The crew tarps your landscaping, backs the dump trailer into the driveway and strips the old roof down to bare decking. Now we find out what shape your roof is really in. Soft plywood, rotted fascia and gaps between deck boards hide under old shingles and show up the instant they come off. Older homes with a wood shake roof usually have skip sheathing, boards with gaps between them, and those need a full re-deck before shingles can go on. We’ve done plenty of them. We photograph anything we find, show you, and replace it before the first roll of underlayment goes down.
Rot repair and roof decking replacement happen right here, not as a surprise invoice later.
Step 6: Installation
With a sound deck under them, the crew rolls out synthetic underlayment, seals the valleys and penetrations, sets drip edge and starter strip, then lays the shingles or metal panels. New flashing goes in at every wall, chimney and pipe boot; reusing old flashing is a shortcut we won’t take. Your crew lead follows the manufacturer’s nailing pattern for the Owens Corning or GAF system you chose, because a shingle nailed wrong fails in the first big wind no matter how good it looked on day one. Ridge vents and caps finish the roof. On a typical single-family home this all happens in one day, start to finish.
See the full scope of a roof replacement.
Step 7: Cleanup
The crew that put the roof on cleans up after it, the same afternoon, before they leave. Old shingles, felt and flashing go into the trailer on site, we clear granules and nails out of the gutters and downspouts, and we sweep magnets across the driveway, beds and yard twice. The tarps come up only after that second pass. Expect noise and a little dust in the attic during the day, so cover anything stored up there the night before. You shouldn’t find a nail in a tire a week later, and if you do, call us and we’ll come back.
Step 8: Final Walkthrough
Before we call the job done, a supervisor walks the finished roof and the ground around the house with you. We check ridge lines, flashing seals, vent boots, pipe collars and gutter attachments from the roof, then look at the siding, windows and driveway from the ground, and we shoot the final photo set. On an insurance job, that packet is what releases your recoverable depreciation. You also get the full photo set, the final invoice and the manufacturer’s product registration details by email, so they’re on file for your records or your carrier. You sign off, we shake hands, and you have a roof you can stop thinking about.
The Insurance Claim Track Runs Alongside the Build
When hail or wind caused the damage, the order of operations shifts a little. Texas-RRR runs a six-step claim process in parallel with the job above. Our staff includes former insurance adjusters, people who've sat on the other side of the table.
Claim step 1
Free Estimate
Same inspection as Step 1, written up in the format carriers expect, with photos tied to each slope.
Claim step 2
Meet the Adjuster
We’re on the roof when your adjuster arrives, pointing out every hit and speaking their language.
Claim step 3
The Audit Process
Line by line, we compare the adjuster’s scope against our findings and flag what they missed.
Claim step 4
Supplemental Report
Missed decking, flashing, code items or ventilation? Those go back to the carrier as a documented supplement.
Claim step 5
Begin Building
Scope approved. Steps 4 through 8 above start, with no change to the build.
Claim step 6
Inspection and Recoverable Depreciation
Your final walkthrough packet goes to the carrier, which then releases the depreciation it held back.
Three things trip up homeowners here. First, Texas law requires you to pay your deductible, and a roofer who offers to waive it is breaking that law; we won’t. Second, if you have a mortgage, the insurance check usually names your lender too. That’s normal. The lender endorses it, sometimes in stages, and we supply whatever paperwork they ask for along the way. Third, a denied or lowballed claim isn’t the end of the road. The audit and supplement steps exist for exactly that case, and a second look from one of our former adjusters tends to turn up items the first scope skipped. The full breakdown, including what to do with a denied claim, lives on our insurance claims page.
Who You’ll Be Working With
Charlie Carreon, our owner, is the name on the estimate and the person who answers when something comes up. He has 30 years of roofing experience, and plenty of our crews have been side by side with us for more than 20. That continuity shows up in the small stuff, like a crew lead who already knows which inspector walked your roof and what he flagged. With eight full crew teams and more than 2,800 completed projects, what you just read is simply our routine. You can read how that plays out in our customer reviews, or get to know the company on our About page.
Why We Run Jobs in This Order
Some roofers quote from the driveway and only find rotten decking after the underlayment is on. That’s backwards, if you ask us. We inspect first, write it down, agree on materials and only then open the roof. You don’t get hit with surprise change orders, and we don’t have to guess. It keeps the timeline honest too, because a scope nobody wrote down is usually where delays start. Need a roof repair, a full replacement through our residential roofing team or a commercial re-roof? The sequence stays the same. After a storm we'll tarp an open roof to stop the water while the rest of the process catches up.
“Be impeccable not only with our word, but the love we have for our God-given talent!”
Roofing Process Questions
There are eight steps: a free inspection, a written estimate, material selection, scheduling, tear-off with a decking inspection, installation, cleanup and a final walkthrough. The first four happen before a truck ever shows up. Five through eight are install day. That's when the crew tarps your landscaping, strips the old roof to the deck, replaces any rotten decking, and puts down underlayment, flashing and the new shingles or metal. Then they clear the site with magnet sweeps, and a supervisor walks the finished roof with you. It's the same sequence if you pay directly or go through an insurance claim.
One day, for a typical single-family home in San Antonio or Austin. A steep pitch can add a day. So can two layers of old shingles, decking repairs or weather. We'll give you the expected timeline when we schedule the job, and we'll call if the forecast changes it.
No. Try to be there for the inspection and the final walkthrough, but install day runs fine without you as long as we can reach you by phone. Before you go, move the cars out of the driveway. Take fragile things off the interior walls, since the hammering shakes them. And keep pets inside or well away from the work zone.
Recoverable depreciation is the part of your claim the insurance company holds back until the roof is finished. First the carrier pays the roof’s actual cash value, which is replacement cost minus depreciation for age and wear. Then we build the new roof. After our final inspection we send the completion packet and photos to your carrier, and it releases the withheld amount. That’s when you pay the rest of the invoice. Policies set a window for finishing the work and requesting the holdback, often stated in the claim paperwork. So don’t let a finished roof sit there without sending the paperwork in.
Still have a question about your job? Reach us through the contact page and Charlie or a coordinator will call you back.
Free estimates, Mon to Sat, 7 AM to 6 PM
Ready to Start at Step One?
Roof evaluations are free across San Antonio and Austin, and after a storm we'll tarp an open roof to stop the water.